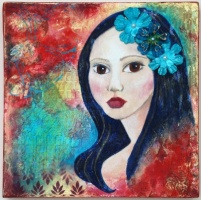
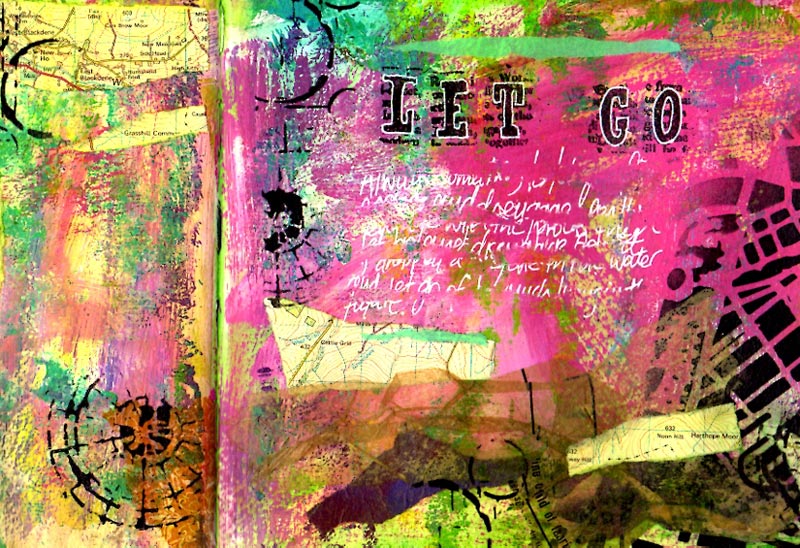
| Favourite Things1 Comment2 October 2014 | Admin When Lesley told me what products she was featuring in this week's email, she asked if I would write about some of them as she knew that the mix included a couple of things that I particularly love. Bloom stampsI'll start with the Bloom face stamps from Prima and give you a sneak preview of a painting that I will be putting on my blog soon.
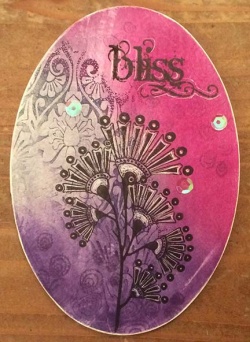
There's a lot of whimsical girls around in the mixed media world at the moment and I hear people talking about faces being one of the hardest things to draw or paint. It's one of the reasons that we jumped at the range of Bloom stamps and stencils from Prima because if you like that style, but don't think you can achieve it, then these stamps and stencils make a brilliant starting point. It takes the fear of drawing out of the picture altogether. I will be writing more about this painting on my own blog, including how I built up the background layers, but I will tell you that the face was stamped onto tissue paper using a very pale ink colour (Archival Pale Ochre) and glued over my background with matte gel. I used this stamp to create the painting above:
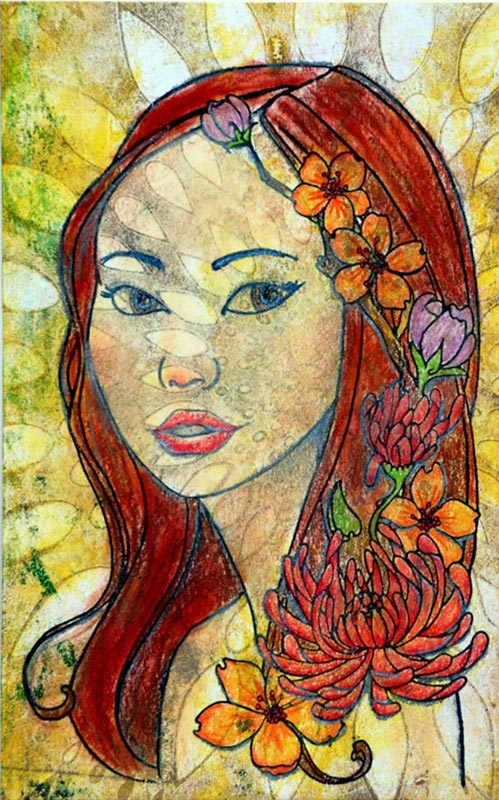
Yes I know, it looks nothing like the original stamp now does it? But that's the point - you can stick with the original or you can use it as a starting point and alter it as much as you want. I like a stamp to be versatile and at first glance you may look at these stamps and think that the face will look the same each time you use the stamp, but as you can see, you can make it your own with slight changes to the angle or size of the features. Simplify parts of it, add embellishments, change the skin tone and hair colour - the variations you can create are endless.Tissue paper is translucent so the background shows through when it is glued down. One of the advantages of this is that you can flip the image over and you will get a mirror image so again, you have more variation from the one stamp.I worked over my tissue paper with paints, but you can colour it before you stick it down (you may need to add a little white paint to the canvas first) or you can work on thin paper (photocopy paper is good) which will be opaque and cover your background. Remember to use a colouring material that won't run when you add glue or gel medium.Here is the same stamp again, stamped over a Gelli print and coloured with PanPastels and coloured pencils. I used a soft (5B) graphite pencil to go back over the stamped lines to give it a rougher, more hand drawn look.
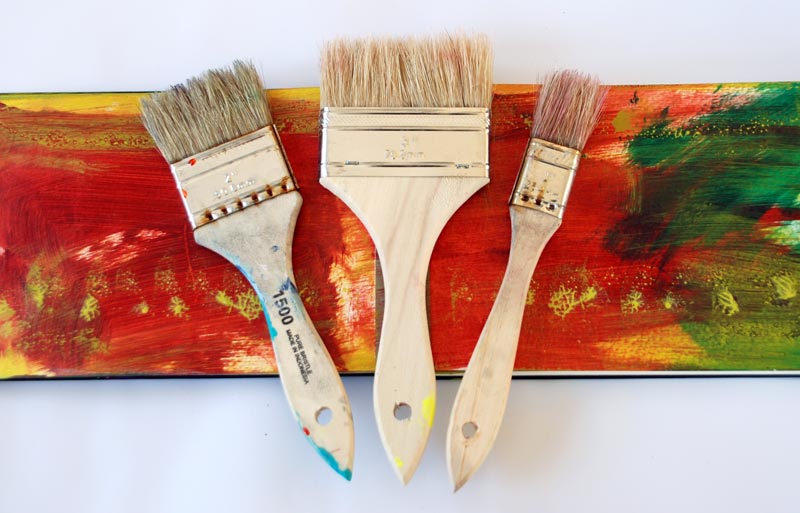
These are quite large stamps which come on their own quite firm cushion and I found that I didn't need an acrylic block, but was able to use the stamp straight from the pack as it is. The canvas is 15 x 15cm square (6x6 inches) and the image above is 13 x 21cm (5 x 8 1/4 inches).If your desire to paint faces is way ahead of your skills at the moment, then invest in a face stamp and you can stamp her over and over to practise - it's like having a self study course at your fingertips! BrushesI have an obsession with brushes that almost matches my obsession with markers and pencils. I have numerous tubs of brushes of all sizes that I have collected over the years. There are times when I don't want to use my expensive brushes, particularly when painting gesso or background colours onto a canvas or journal page. I often want something quite large to get the surface covered quickly and I have a tub of cheap bristle brushes that I can reach for and scrub the paint or gesso onto the paper or canvas quickly.I asked Lesley to source some cheap bristle brushes and she found this great pack of three which includes a 1 inch, 2 inch and 3 inch - perfect!
I like the painterly effect you get with a large brush and the texture that is created. I am particularly fond of painting a journal page very loosely with a large brush, then when dry going over it with inks or sprays and seeing the brushstrokes highlighted as the untouched parts of the paper absorb the more watery colour in a different way to the painted areas. You can see this rough, painterly effect in this detail photo of one of my journal pages where I went over the paint with Squeezed Lemonade Distress ink.
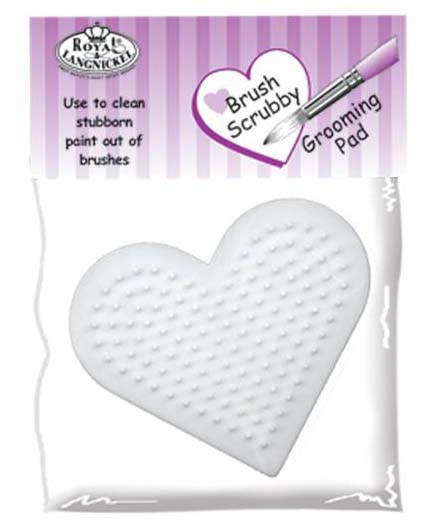
Brush ScrubberAnd finally, if you have never seen or used a brush scrubber before, let me tell you it is the most useful piece of pimply plastic you will ever own! I have had one for over fifteen years and I wouldn't be without it. It's taken me years to find a supplier of them, so I was stupidly delighted to find these cute little heart shaped ones.
Simply hold the scrubber in the palm of your hand, dip your brush in a little soap then rub your brush back and forth over the spikes and let it do the work of loosening any built up paint in the ferrule. Repeat under a running tap to rinse off the soap, then shape the bristles with your fingers and leave your brush to dry. Always drag the brush from the ferrule (that's the bit where the bristles are clamped together) towards the tip.It is particularly good for brushes you use with gel medium or glue where you can't always see the build up on the bristles. I have even managed to rescue brushes with dried on acrylic paint - soak in hot water for ten minutes before dragging over the spikes. It depends on the size of the brush and the amount of paint as to whether you will be able to fully rescue it, but it's worth a try.I hope you've enjoyed my little write ups and if you are not on our mailing list then please click here to sign up and enjoy Lesley's weekly round up of featured and new products and offers.
|
|
.jpg)


I love your stamps they are so inspiring! I also w saw one of the teaching videos on here and it was great to see some new ideas.