Quick Christmas Makes
5 Comments26 November 2016 | Admin
Hello everyone, it's Glenda here and I'm delighted to be collaborating with Lesley on some new stamp designs. I am starting with a set of Christmas words which always come in handy at this time of year. I am an absolute font addict and love to mix and match different types of script to create quirky and fun stamps, so I hope you enjoy these as much as I have.
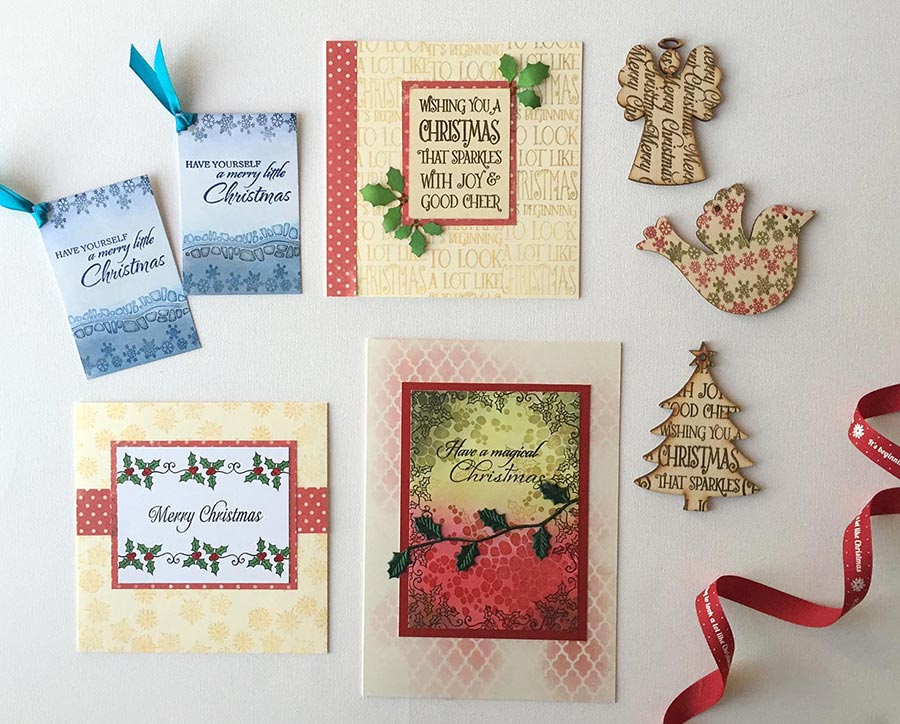
The cards, tags and ornaments you see above were made in a morning and I have some left over bits that will make up into more cards or tags too. So I'd like to give you a very brief outline of how I put these together because they really were all very quick to produce and hopefully easy for beginners.
Good Cheer Card
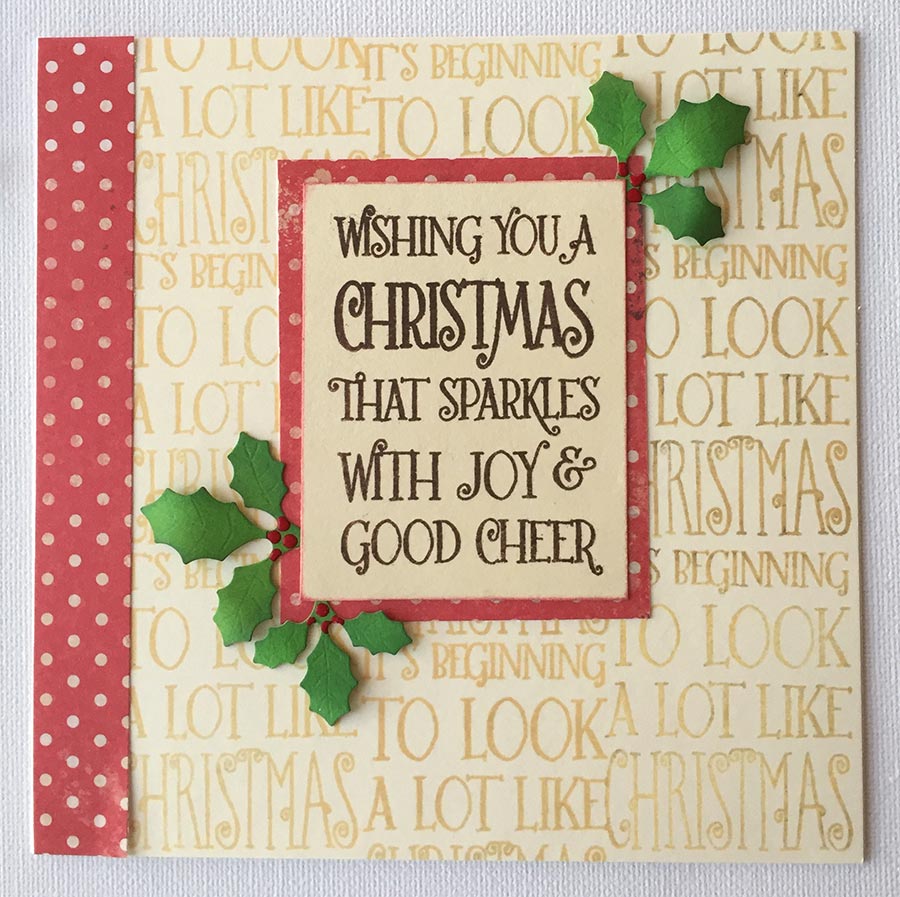 | Materials Christmas Sparkle clear stamp set Archival inkpads: Pale Ochre, Potting Soil Cream folded 6x6 inch card Cardstock: cream, green and red patterned Crealies Shape die - 17 Double sided tape Zig 2 way Glue Pen - Chisel Tip Red paint/glitter Optional: Stylus tool, green inkpad, |
| Start by creating the background using the Pale Ochre inkpad to stamp "It's beginning to look a lot like Christmas" all over the background. I worked in strips, starting at the bottom right of the card. (That's because our eyes naturally read left to right, top to bottom, so I didn't want to cut the phrase off half way at that point on the card.) The beauty of clear stamps is that it's so easy to line up and stamp the words very close to each other to give the impression of a single, all over background text stamp. Stamp in vertical columns until the card front is full. Stamp the Good Cheer sentiment onto cream card using a dark brown ink (Potting Soil). Attach a strip of red patterned card down the left edge of the card and cut a layer from the same paper for your main sentiment. Die cut some tiny holly leaves and attach them to the red paper, then stick the sentiment over the top. Attach to the centre of the card. Add some red berries to the holly with paint or Stickles. TIP To add a bit of dimension to the leaves, use a small round ended stylus tool to score some veins into the holly leaves and add a touch of green ink. Curl the leaves gently before sticking down just the stems. | 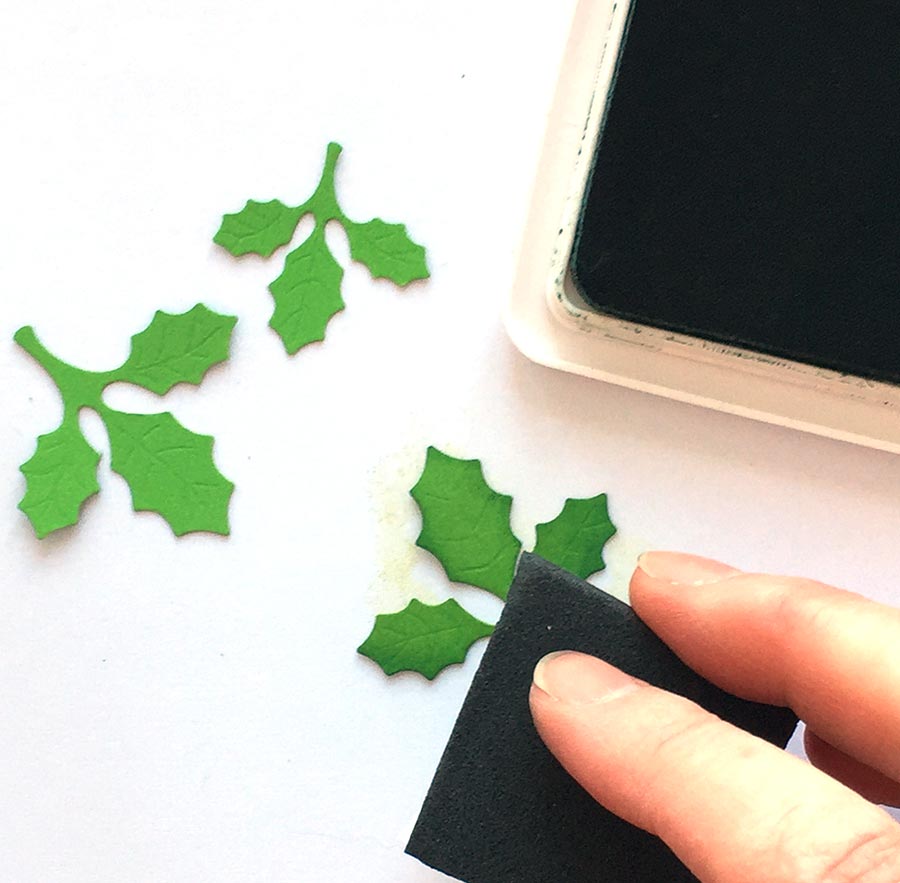
| |
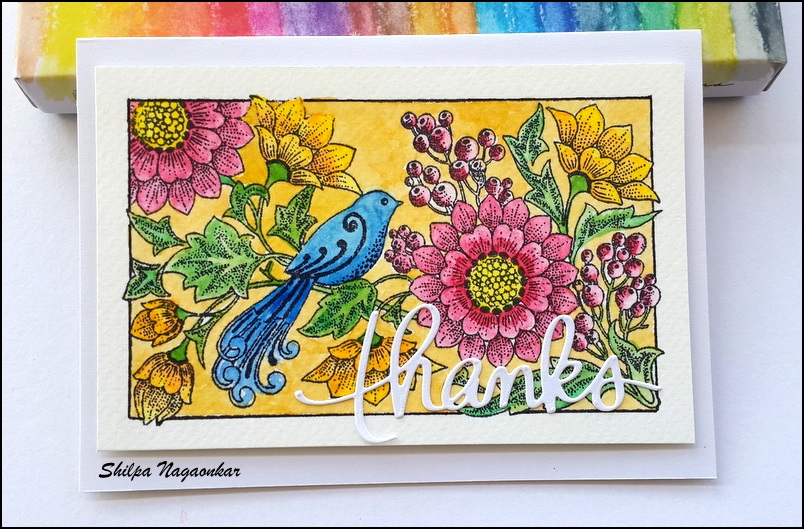
Holly Sprig Card
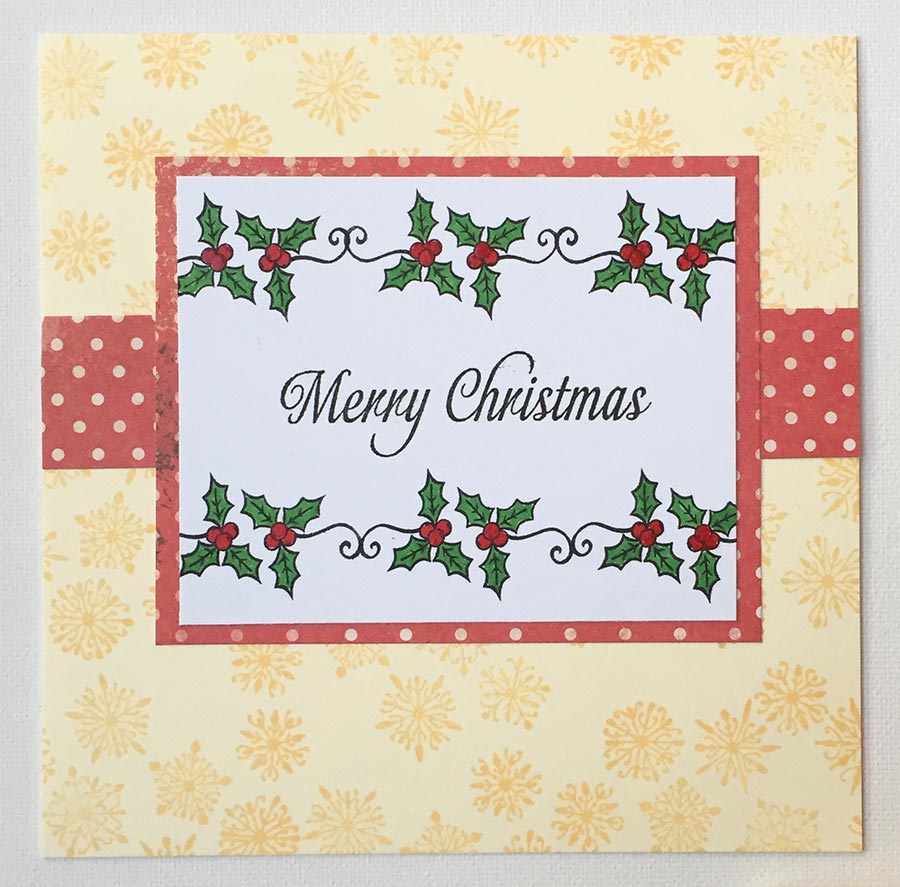 | Materials Christmas Sparkle clear stamp set Seasonal Fragments rubber stamp set Archival inkpad: Pale Ochre Versafine inkpad: Onyx Black Cream folded 6x6 inch card Cardstock: white, red patterned Green and red markers Double sided tape |
| Using one of the snowflake stamps from Seasonal Fragments, stamp the cream card all over with Pale Ochre ink. Stamp a sentiment on a piece of white cardstock and stamp the double holly swirl three times above and below with Onyx Black ink. Let it dry then colour the leaves and berries with markers. Trim the stamped piece and stick onto a slightly larger layer made form red patterned card. Attach a strip of the patterned card across the cream stamped card horizontally and stick the stamped panel over the top. |
Wooden Ornaments I had some wooden laser cut shapes in my stash from ages ago and thought they would look good stamped up with some Christmas words. With hindsight, I would probably coat them with matte medium or clear gesso before starting as the ink I used (Archival) has just feathered a tiny bit. I chose a dark brown on the Christmas tree which already had quite brown edges from the laser cutting process. On the bird I used the snowflakes, alternating red and green for a Scandi-look and on the Angel I tried running the words vertically. | 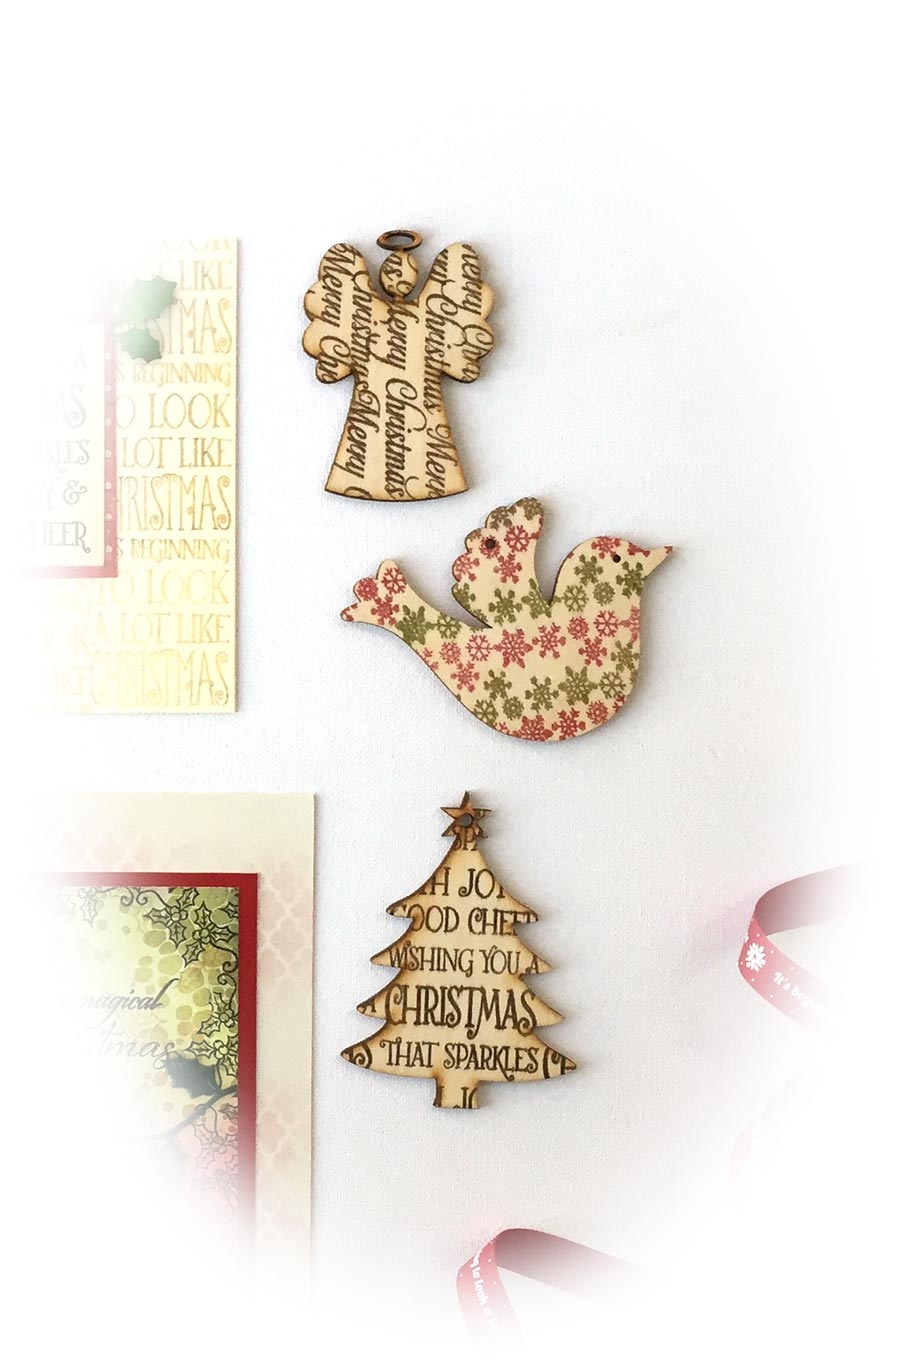
|
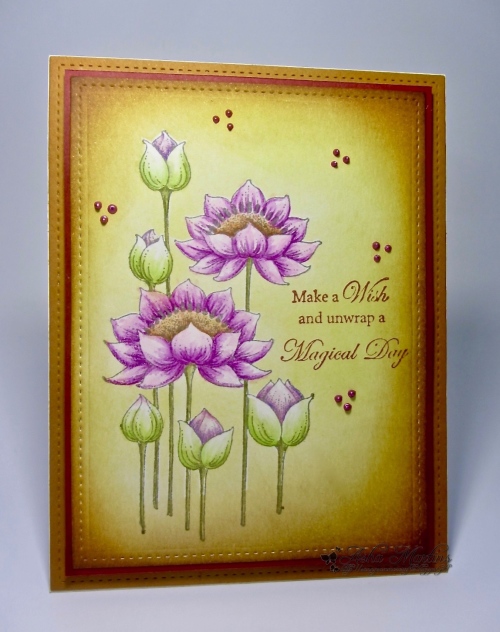
Magical Pastel Card
 | Materials Christmas Sparkle clear stamp set Harlequin Fragments Rubber stamp sheet - A4 Pan Pastels: Bright Yellow Green, Permanent Red, Chromium Oxide Green Extra Dark Sofft sponge VersaMark Watermark Stamp Pad Versafine inkpads: Onyx Black, Spanish Moss Cream folded A5 card Cardstock: white (A6 sized piece), red Stencil (your choice, but diamonds, trellis, dots or similar work well) Barn Door Distress Ink Pad Domed Stencil Brush Double sided tape Holly leaf trim |
| 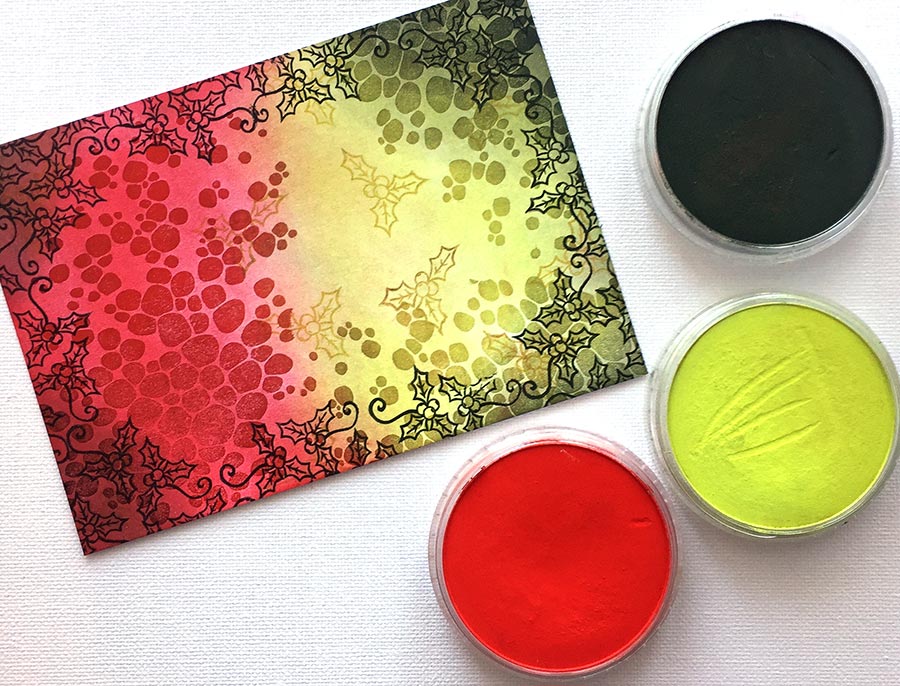 Select the bold dots stamp from the Harlequin Fragments stamp set and stamp it a few times onto white cardstock using Versamark ink. Select the bold dots stamp from the Harlequin Fragments stamp set and stamp it a few times onto white cardstock using Versamark ink.
Use the Sofft sponge to apply a mix of Bright Yellow Green and Permanent Red PanPastel to the card, taking care not to overlap the red and green too much (where it will create brown). Leave a section of lighter colour for the sentiment to fit. Add a touch of the dark Chromium Oxide Green around the edges. Wipe off any excess gently with kitchen towel. Stamp holly sprigs around the edges of the card with Onyx Black and one or two randomly over the card with Spanish Moss Versafine ink. Stamp the sentiment and layer onto red card. Add patches of stencilling to the A5 card using a stencil brush and a swirling motion to fade the colour out. Attach the stamped panel to the centre of the card. This is the messiest of the techniques, so why not make a few backgrounds while you have the pastels out. Remember to leave some 'quiet space' somewhere if you want to stamp a sentiment straight onto your background - for batch production, it saves a lot of time compared to matting and layering. |
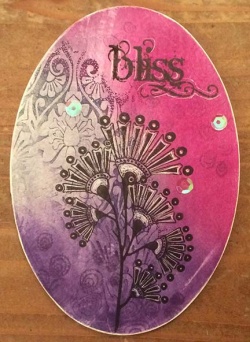
Snowy Gift Tags
| 
| Materials Christmas Sparkle clear stamp set Harlequin Fragments Rubber stamp sheet - A4 Pan Pastels: Phthalo Blue, Ultramarine Blue, Ultramarine Blue Extra Dark, White Sofft Sponge VersaMark Watermark Stamp Pad Versafine Inkpad Majestic Blue White card (approx 2.75 x 4 inches) Blue ribbon |
| 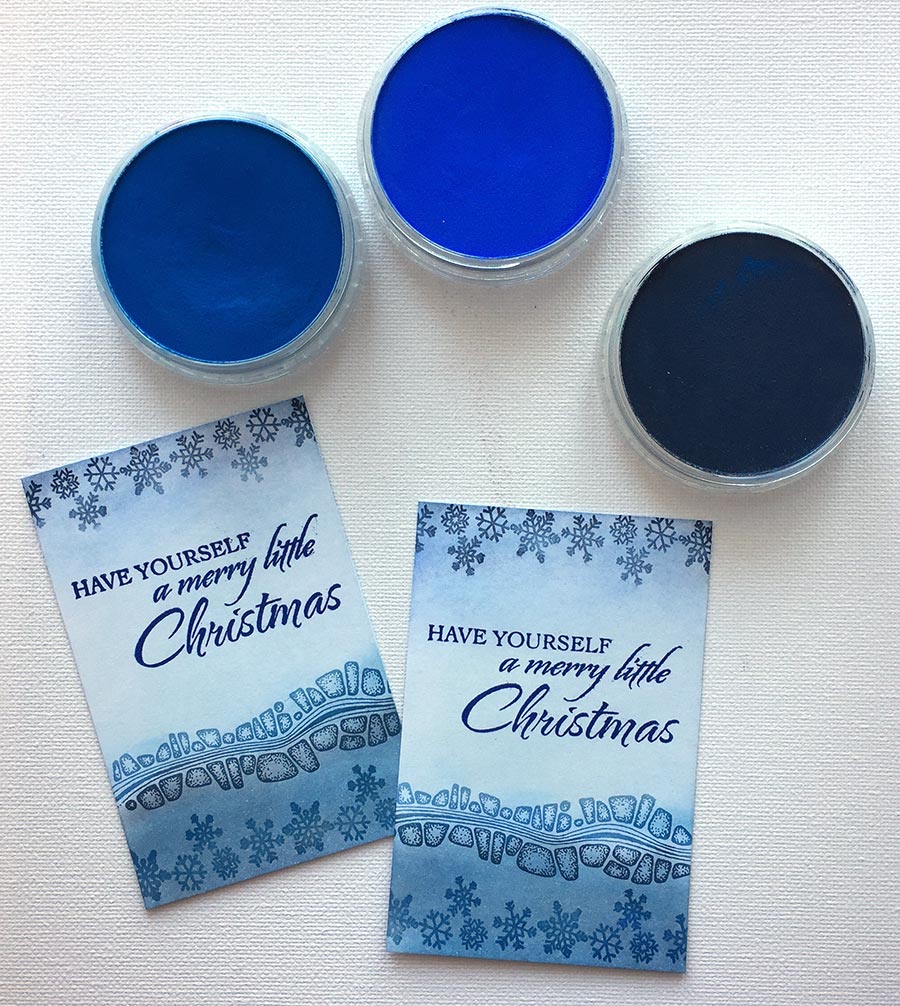 Use the Sofft sponge to apply white PanPastel to the card, then add in some Ultramarine and a tiny bit of Phthalo Blue. Use the Sofft sponge to apply white PanPastel to the card, then add in some Ultramarine and a tiny bit of Phthalo Blue.
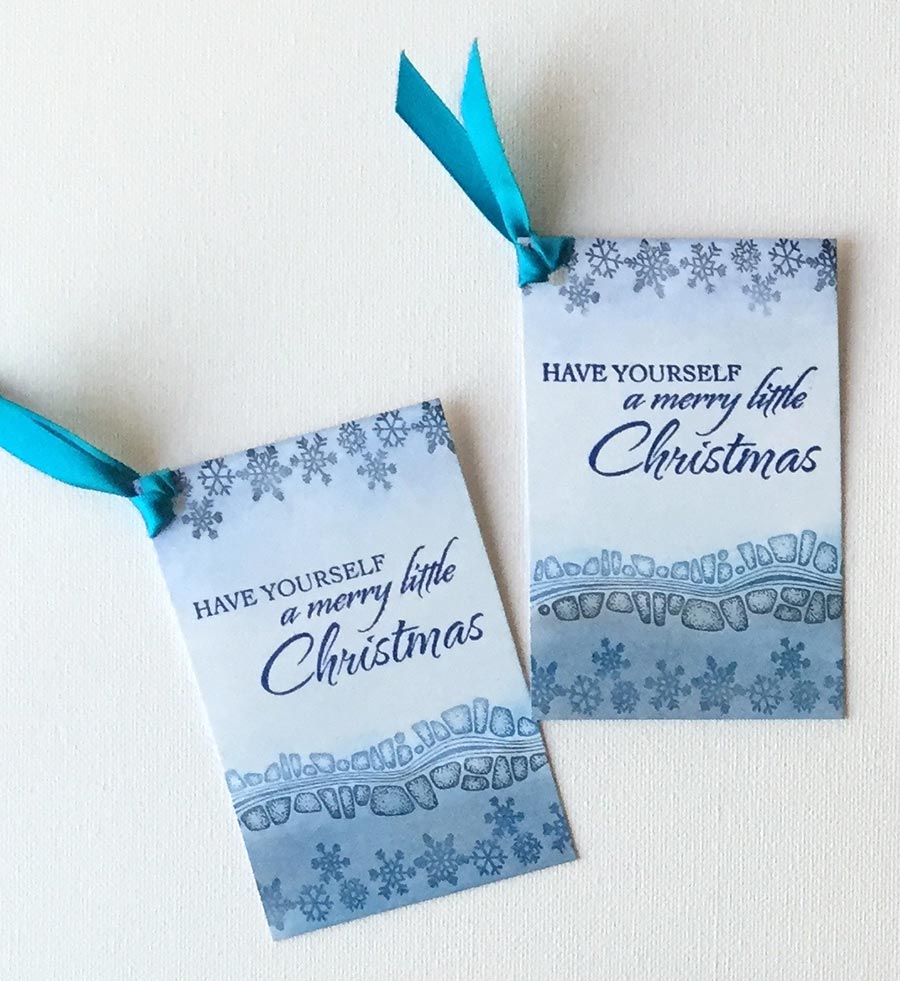
Buff the card hard with kitchen towel to remove any loose powder then stamp the snowflakes from Christmas Sparkle along the top and bottom using Versamark, then stamp the smallest stamp on the Harlequin Fragments stamp set (reminds me of a dry stone wall) just above the bottom snowflakes. Use the sponge to apply Phthalo blue along the top of the fragment stamp and blend it with the Ultramarine Dark towards the bottom. Use small circular motions to blend the colours onto the card. Gently pat the sponge onto the snowflakes at the top and let the Versamark pick up the residual pastel off the sponge. Lightly rub the card with kitchen towel and stamp your chosen sentiment in the space between the stamped images. Punch a hole in one corner and attach a ribbon for stylish gift tags. |
I hope you've enjoyed my little batch of quick makes, it's been fun to get back to a bit of stamping!

.jpg)


Thanks Glenda. Some lovely cards that won't take ages to make. Love the tags.
They are great. Beautiful.
Janny
Hi glenda. Love your quick makes, they are all very attractive. The wooden shapes are Artcuts shapes. You can stamp directly onto the wood with a Brilliance or Versamagic inkpad , without it bleeding. Hope this is helpful. Best wishes. Carole
Thanks Carole, that's great.
Hooray! At last, I now have a good way of using Pan Pastels. Thank you. I would appreciate seeing some more videos or just tips on how to use them.
Thank you.