Quick and Easy Pillow Boxes
16 October 2014 | Admin
Last week I was playing with the flower and gift box punch boards and I really am impressed with the design and quality of these boards from We R Memory Keepers so I invested in another in the range, the pillow box punch board. Many of us these days have a complex set of family relations with half-, step- and -in-laws. Keeping track of the growing number of youngsters in my family is a challenge, never mind keeping up with who has which toys. So at Christmas I sometimes find it easier to give cash or gift vouchers and once they are old enough to appreciate the gift, I am always looking for a creative way to dress them up rather than just popping it inside a Christmas card or plain envelope. When I saw the pillow box punch board I thought it would be perfect for the job.
The board is designed to take card that is 6 inches wide (15.2cm), but you can vary the length and the board will accommodate card up to 12 inches (30.4cm) long easily. I decided to make a batch of these and discovered that if you stick to a length of no more than 5.5 inches, you can use our Big Bold Background stamps to cover the entire box, making it entirely feasible to whip up a whole load in one sitting. If you find the punching hard on your hands, do what I do and place a 4x4 inch acrylic block over the top of the punch - I find the bigger surface area much easier to press down. I always stand up to punch too.The instructions that come with all the punch boards are very clear and really easy to follow. When you have done your punching and scoring, you trim the flap and you will have this as your finished shape.
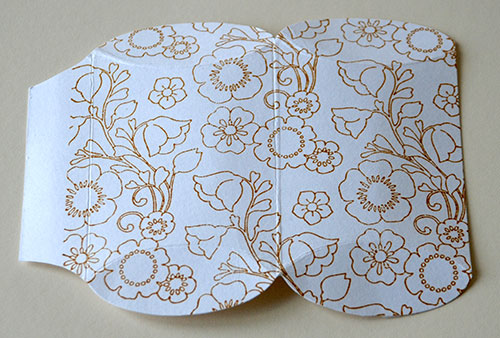
All you need to do then is glue the flap to the inside of the box and once dry you fold in your curves. Don't forget to punch a notch in at least one of the curves on each end which you do using the reverse punch on the board. Fold the notched curve in first so when you are opening the box, you are able to get your finger in and open the flap, otherwise it can get wedged in place.
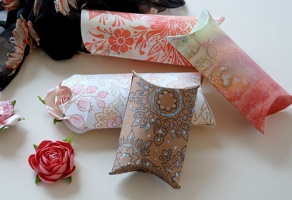
I have stamped this with Versafine Toffee ink using our Belle Flowers Big Bold Background stamp. It doesn't matter if the flap isn't covered as this is glued inside the box and can't be seen.These look great made with printed cardstock or your own backgrounds. They're a great way to use up a stack of gelli printed backgrounds for example. Here's a tip though, if you want to stamp and use embossing powder, I would stamp after you have scored the lines, but before you have creased any of them. That way, the ink should just miss the indents of the scored line so you shouldn't get the embossing powder flaking off when you crease the box.
The clever thing about the board is the curved punching and scoring at the top and bottom of each box, so you can actually make them even longer than the recommended 12 inches. You will find that you only have a vertical scored line at the top and bottom, so you will need to use a ruler and connect the vertical scored lines in the middle. Handy if you're giving anyone a pair of drumsticks as a gift!
I think they're sweet for sending a little crafty gift to a friend. Imagine filling these with paper flowers, ribbons, buttons or charms. In the picture above, I managed to fit a chiffon scarf into one box - an ideal stocking filler. If you are a DIY bride working on a hand crafted wedding, wouldn't these make gorgeous little favour boxes filled with sugared almonds? But I think my favourite use of these this year is going to be to make some little ones to hang on the Christmas tree - I love having hand made items on my tree and they'll be just the right size to tuck in a little chocolate treat!

.jpg)

