Winter Tree Project by Miranda
2 Comments11 February 2015 | Admin
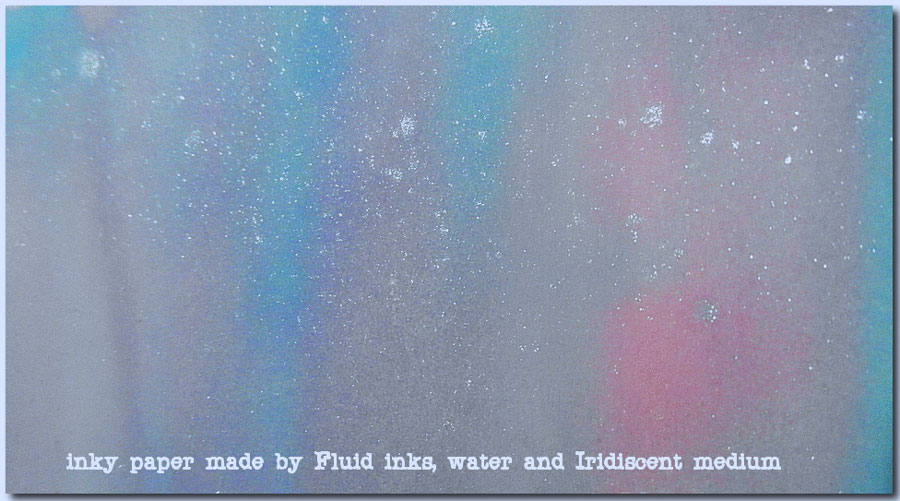
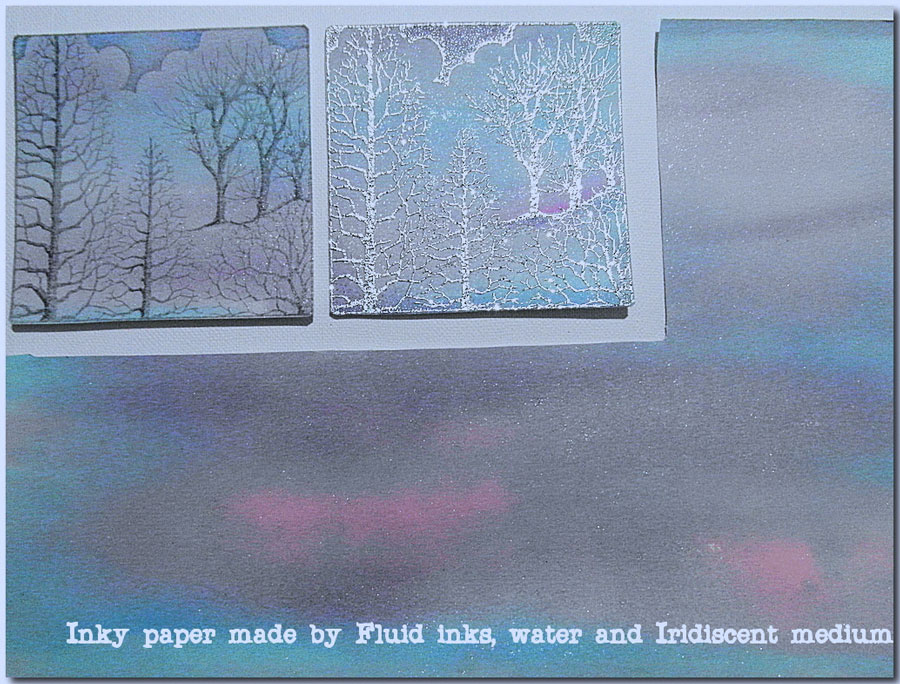
| Hi everyone, it's Miranda here with two step by step projects for you. I have used the small version of the January Winter Tree stamp which is the first stamp in the "A Year of Stamping" series (abbreviated to AYOS). This is a lovely stamp which - like all the AYOS stamps - is available in two sizes. You can read more about the AYOS project club in a previous blog post here, but in a nutshell, throughout the year there will be a new AYOS design every month which you can buy in either size (or both if you like). Buying an AYOS stamp lets you download the corresponding month's free AYOS magazine and you can also join the Year of Stamping Facebook group where you can see and share artwork made with the stamps. These cards are both made using the same background paper - you can find the technique I've used in the magazine that comes with the AYOS January stamp. | 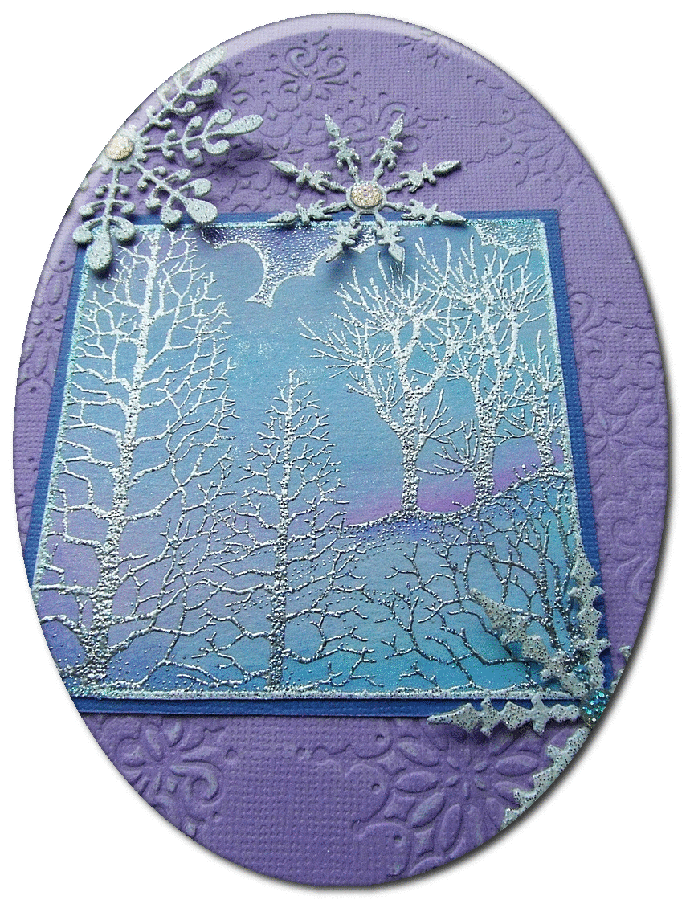
|
Here you can see the paper I've made.
I hope you like these cards - you will find the instructions below.
Above all, have fun with the creative process!

Hello Winter Card
You will need: | 
|
To make card:
- Stamp the winter tree scene with Memento Gray Flannel onto the coloured background.
- Accentuate the trees with a dark grey pencil
- Ink the edges one by one with Versamark
- Apply Wow Silver Sparkle embossing powder
- Use heat tool to emboss
- Stamp the bird on the flower hearts (from the Fluttering Hearts set) with Versamark
- Apply Wow Silver embossing powder
- Use heat tool to emboss
- Colour the image using water-based markers and water-brush
- Cut out the image
- Cut out the winter tree scene
- Matt onto lilac cardstock
- Die cut the word
- Attach all onto blue card
Winter Snowflake Card
You will need: - Small January Winter Tree stamp
- Lilac coloured core cardstock 19x28cm
- Lavender coloured cardstock for matting
- Smooth watercolour paper
- Wow embossing powders: Silver, Sparkling Snow
- Versamark pad
- Heat tool
- Dies: Snowflakes and the word 'Winter'
- Snowflake embossing folder
- Iridescent gemstones
- Sandpaper
- Water-based markers in matching colours
- Water-brush
| 
|
To make card:
- Stamp the winter tree scene with Versamark onto coloured background and apply Wow Silver embossing powder. Emboss using the heat tool.
- Ink the edges one by one with Versamark and dip edges into Wow Sparkling Snow embossing powder. Emboss using the heat tool.
- Add accents of colour with water-based markers and water-brush.
- Dry emboss card using embossing folder and sand the embossed areas.
- Press die cuts onto a Versamark inkpad to coat all over with ink.
- Apply Wow snowflake embossing powder and heat to emboss.
- Cut out the winter tree scene and mat onto lavender cardstock.
- Attach all parts to base card.
- Glue gemstones into centre of snowflakes.
.jpg)


These are really beautiful Miranda , thank you for sharing your ideas and techniques.
Suexxx
Both such beautiful cards and these are my favourite colours too.